alinux3 安装与配置指南
本文将详细介绍 alinux3 的安装与配置过程。
alinux3 概述
Alibaba Cloud Linux是阿里云打造的Linux服务器操作系统发行版。阿里云积极吸收开源社区成果,为云上应用程序提供Linux社区的增强功能,并通过引入更完善的发行版质量体系确保产品品质。同时结合阿里云基础设施进行深度优化,并为用户提供长达10年的企业级支持和维护,让阿里云用户体验更好的操作系统服务。
alinux3是阿里云基于Anolis OS 8构建的企业级Linux操作系统,旨在为云上应用程序提供稳定、安全和高性能的运行环境。它继承了Anolis OS的核心特性,并针对云计算场景进行了优化,以满足企业用户在云端部署和管理应用程序的需求。而Anolis OS 8又 100% 兼容 RHEL 8 / CentOS 8 生态,提供 ANCK 与 RHCK 双内核,是 CentOS 8 EOL 后的平滑迁移方案。已在阿里云及众多金融、运营商核心系统中规模部署。
官方链接
下载链接
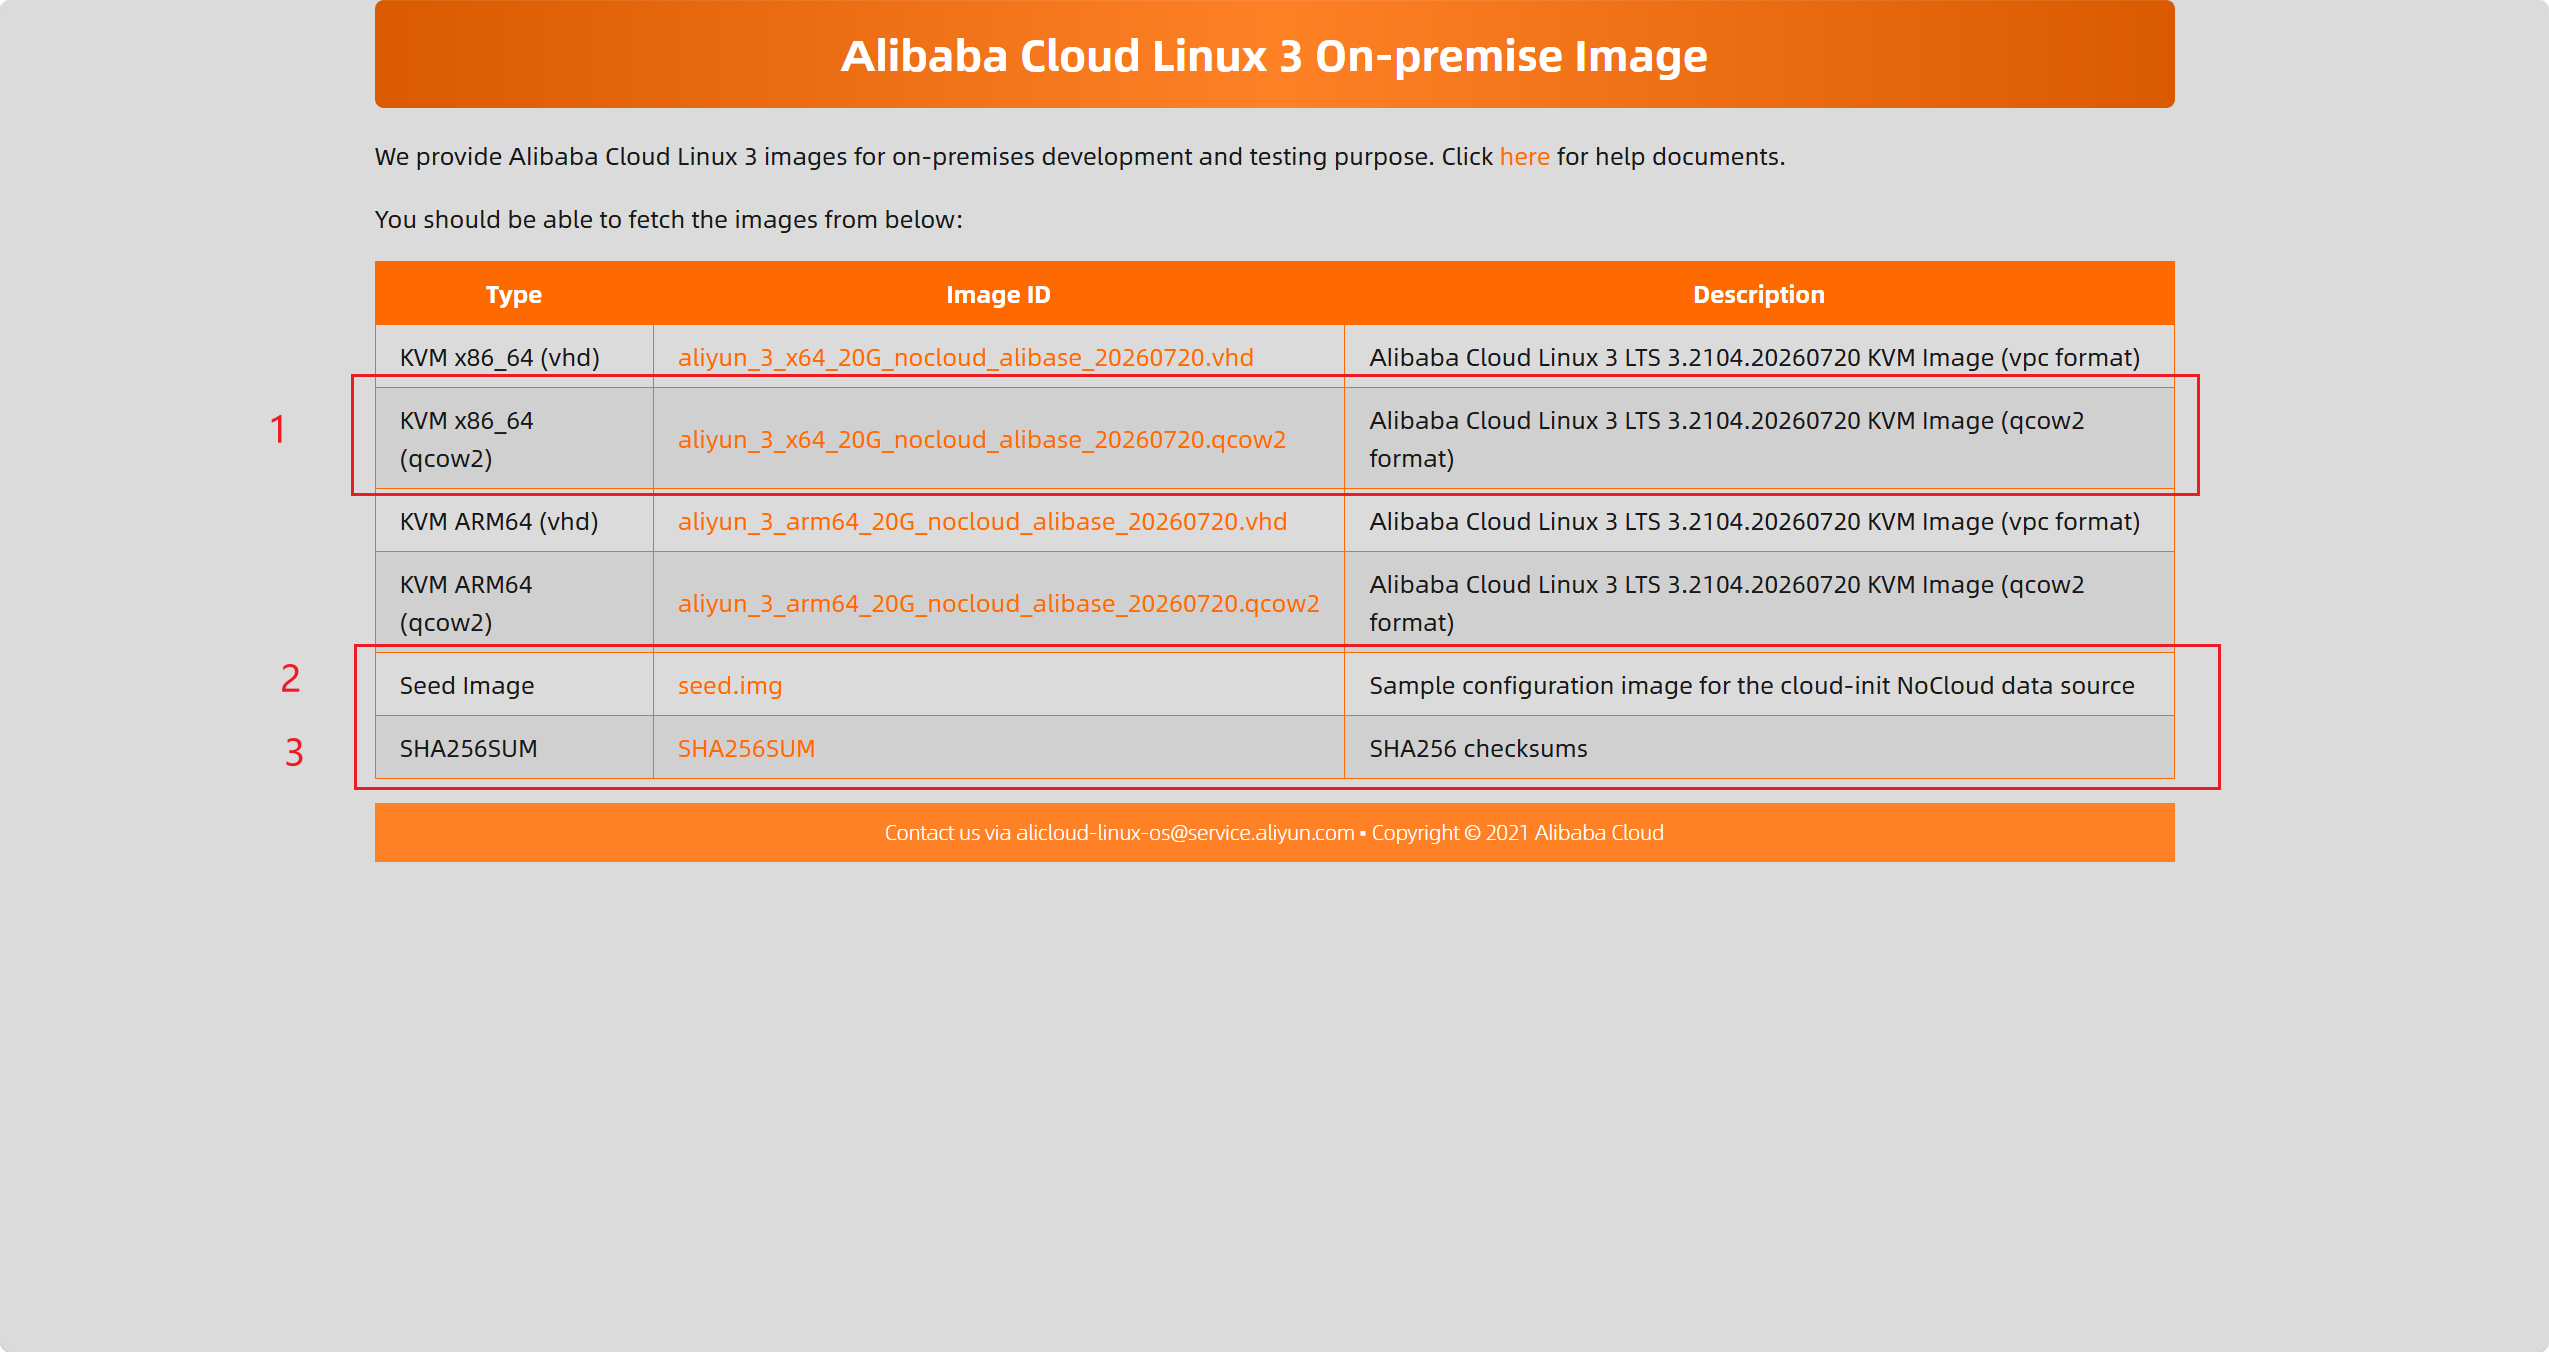
我的电脑是win11+vmware26+intel ultra 125h,所以下载这三个文件:
安装步骤
转换镜像格式
在安装 alinux3 之前,需要将下载的镜像文件转换为 VMware 支持的格式。可以使用 starwind-v2v-converter 工具进行转换。
- qcow2 转 vmdk
- img 转 iso
转换步骤:选 Local file → 选 qcow2 → 目标选 VMDK → growable,一路 Next。
这个只转系统盘。别忘了 seed.img 之后要改名成 seed.iso,在 VMware 里当光盘挂在第二驱动器上——少了它开机会卡在登录界面。
创建虚拟机
关键点:别选”安装程序光盘映像”,这盘是已经装好系统的,没有安装过程。
- 文件 → 新建虚拟机 → 自定义(高级)
- 硬件兼容性:VMware
- 安装来源:选 「稍后安装操作系统」
- 客户机操作系统:Linux → 版本选 Red Hat Enterprise Linux 8 64 位(Alinux 3 兼容 RHEL 8 生态)
- CPU 2 核、内存 4 GB、网络 NAT
- 磁盘:选 「使用现有虚拟磁盘」 → 浏览选中 alinux3.vmdk → 完成后会问你要不要转换格式,选保持现有格式
- 先别开机 → 「编辑虚拟机设置」→ 添加 CD/DVD 驱动器 → 使用 ISO 映像文件 → 指向 seed.iso → 勾上「启动时连接」
- 开机
登录系统
- 默认用户名:alinux
- 默认密码:aliyun
配置密钥认证登录
镜像默认关掉了 SSH 密码登录,只认密钥。如果用密码连,服务器直接拒了。
解法:
先在本地生成密钥对(如果没有的话),然后一路回车:
1
  ssh-keygen -t ed25519
先进虚拟机控制台,开密码登录
1
2
3
4
  # 1. 开启密码登录
  sudo sed -i 's/^PasswordAuthentication no/PasswordAuthentication yes/' /etc/ssh/sshd_config
  # 2. 重启 sshd 生效
  sudo systemctl restart sshd
在本地终端ssh登录alinux
1
  ssh alinux@<虚拟机IP>
在alinux生成密钥对
1
2
3
4
  ssh-keygen -t ed25519
  # 把公钥写入 authorized_keys
  cat ~/.ssh/id_ed25519.pub >> ~/.ssh/authorized_keys
  chmod 600 ~/.ssh/authorized_keys
将本地公钥上传到alinux虚拟机
1
2
  # 在windows powershell里执行
  type $env:USERPROFILE\.ssh\id_ed25519.pub | ssh alinux@server_ip "cat >> ~/.ssh/authorized_keys"
最后在alinux虚拟机里关掉密码登录
1
2
  sudo sed -i 's/^PasswordAuthentication yes/PasswordAuthentication no/' /etc/ssh/sshd_config
  sudo systemctl restart sshd
配置网络
alinux3 默认使用
NetworkManager管理网络接口,配置网络可以通过nmcli命令行工具或者编辑配置文件来完成。参考链接:NetworkManager常用操作。
确定连接名称:
1
nmcli -f NAME,DEVICE,TYPE connection show
1
2
3
4
[alinux@alinux-host ~]$ nmcli -f NAME,DEVICE,TYPE connection show
NAME         DEVICE  TYPE
System eth0  eth0    ethernet
[alinux@alinux-host ~]$
连接名是 System eth0,然后配置静态IP:
1
sudo nmcli connection modify "System eth0" ipv4.addresses 192.168.81.137/24
查看默认网关:
1
ip route show default
1
2
3
[alinux@alinux-host ~]$ ip route show default
default via 192.168.81.2 dev eth0 proto static metric 100
[alinux@alinux-host ~]$
默认网关是 192.168.81.2,然后配置默认网关:
1
sudo nmcli connection modify "System eth0" ipv4.gateway 192.168.81.2
配置默认dns:
1
sudo nmcli connection modify "System eth0" ipv4.dns "119.29.29.29 8.8.8.8"
设置ip为手动模式:
1
sudo nmcli connection modify "System eth0" ipv4.method manual
激活连接使配置生效:
1
sudo nmcli connection up "System eth0"
测试网络连通性:
1
ping -c 4 baidu.com
1
2
3
4
5
6
7
8
9
10
11
[alinux@alinux-host ~]$ ping -c 4 baidu.com
PING baidu.com (124.237.177.164) 56(84) bytes of data.
64 bytes from 124.237.177.164 (124.237.177.164): icmp_seq=1 ttl=128 time=38.7 ms
64 bytes from 124.237.177.164 (124.237.177.164): icmp_seq=2 ttl=128 time=55.4 ms
64 bytes from 124.237.177.164 (124.237.177.164): icmp_seq=3 ttl=128 time=42.4 ms
64 bytes from 124.237.177.164 (124.237.177.164): icmp_seq=4 ttl=128 time=41.8 ms

--- baidu.com ping statistics ---
4 packets transmitted, 4 received, 0% packet loss, time 3003ms
rtt min/avg/max/mdev = 38.725/44.583/55.400/6.403 ms
[alinux@alinux-host ~]$