WSL2 安装与配置指南
本文档涵盖:Win11 安装 WSL2 → 离线安装 Ubuntu 24.04 → 安装 Git → 离线安装 VS Code Server
目录
1. Win11 安装 WSL2
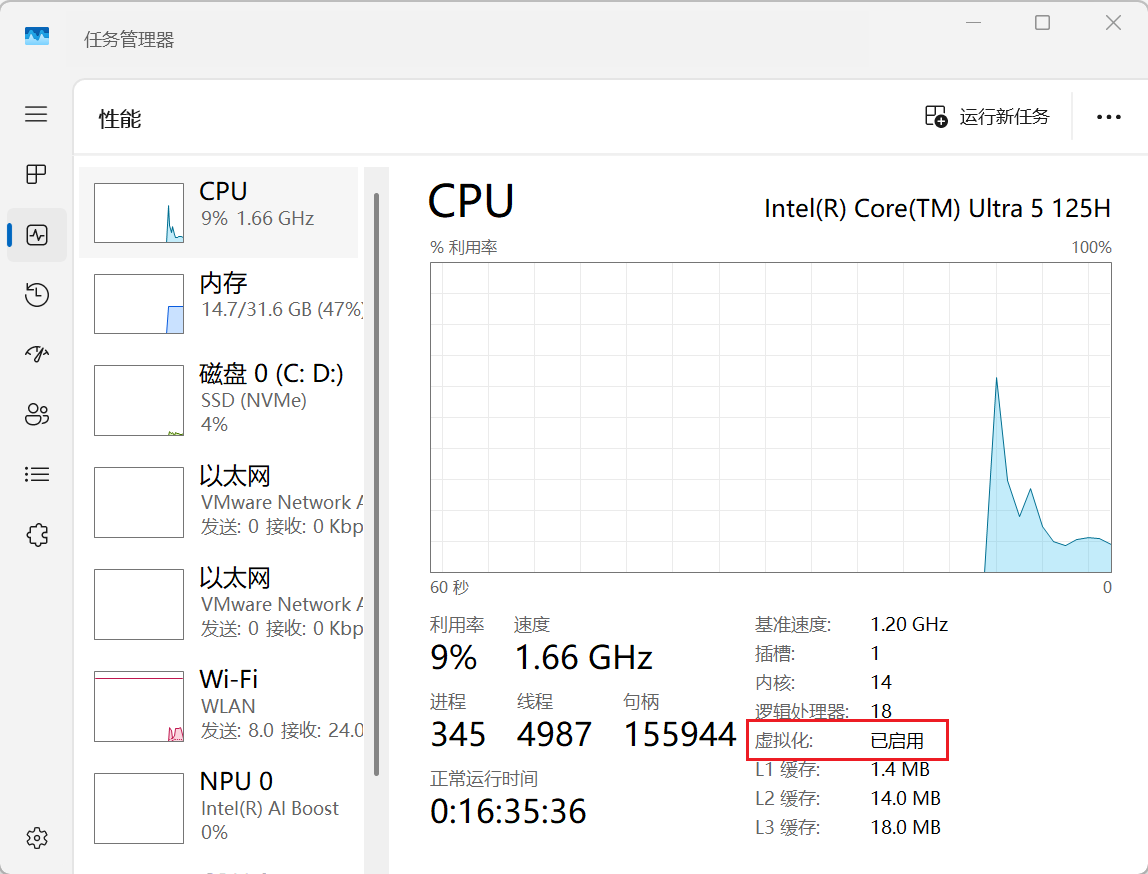
1.1 开启虚拟化功能
默认已启用,可在 BIOS/UEFI 中确认。
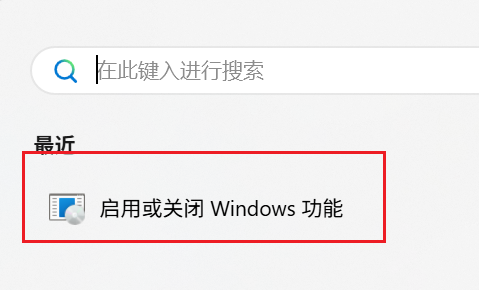
1.2 启用 Windows 功能
打开「启用或关闭 Windows 功能」,勾选以下两项:
- 适用于 Linux 的 Windows 子系统
- 虚拟机平台
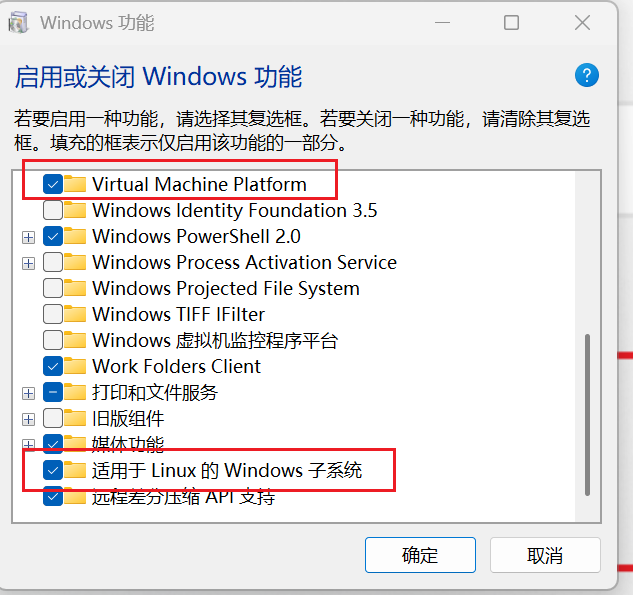
勾选后重启电脑。
1.3 安装 WSL2
下载链接(百度网盘):
链接: https://pan.baidu.com/s/14u-k0jb–u51sifmsZednw?pwd=e8ys 提取码: e8ys
1.4 验证安装
1
wsl -v
2. 离线安装 Ubuntu 24.04
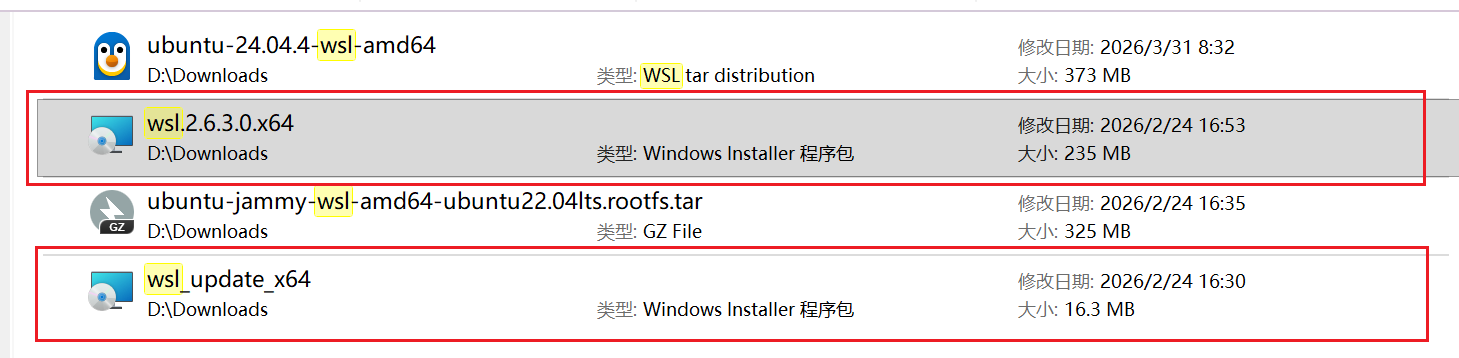
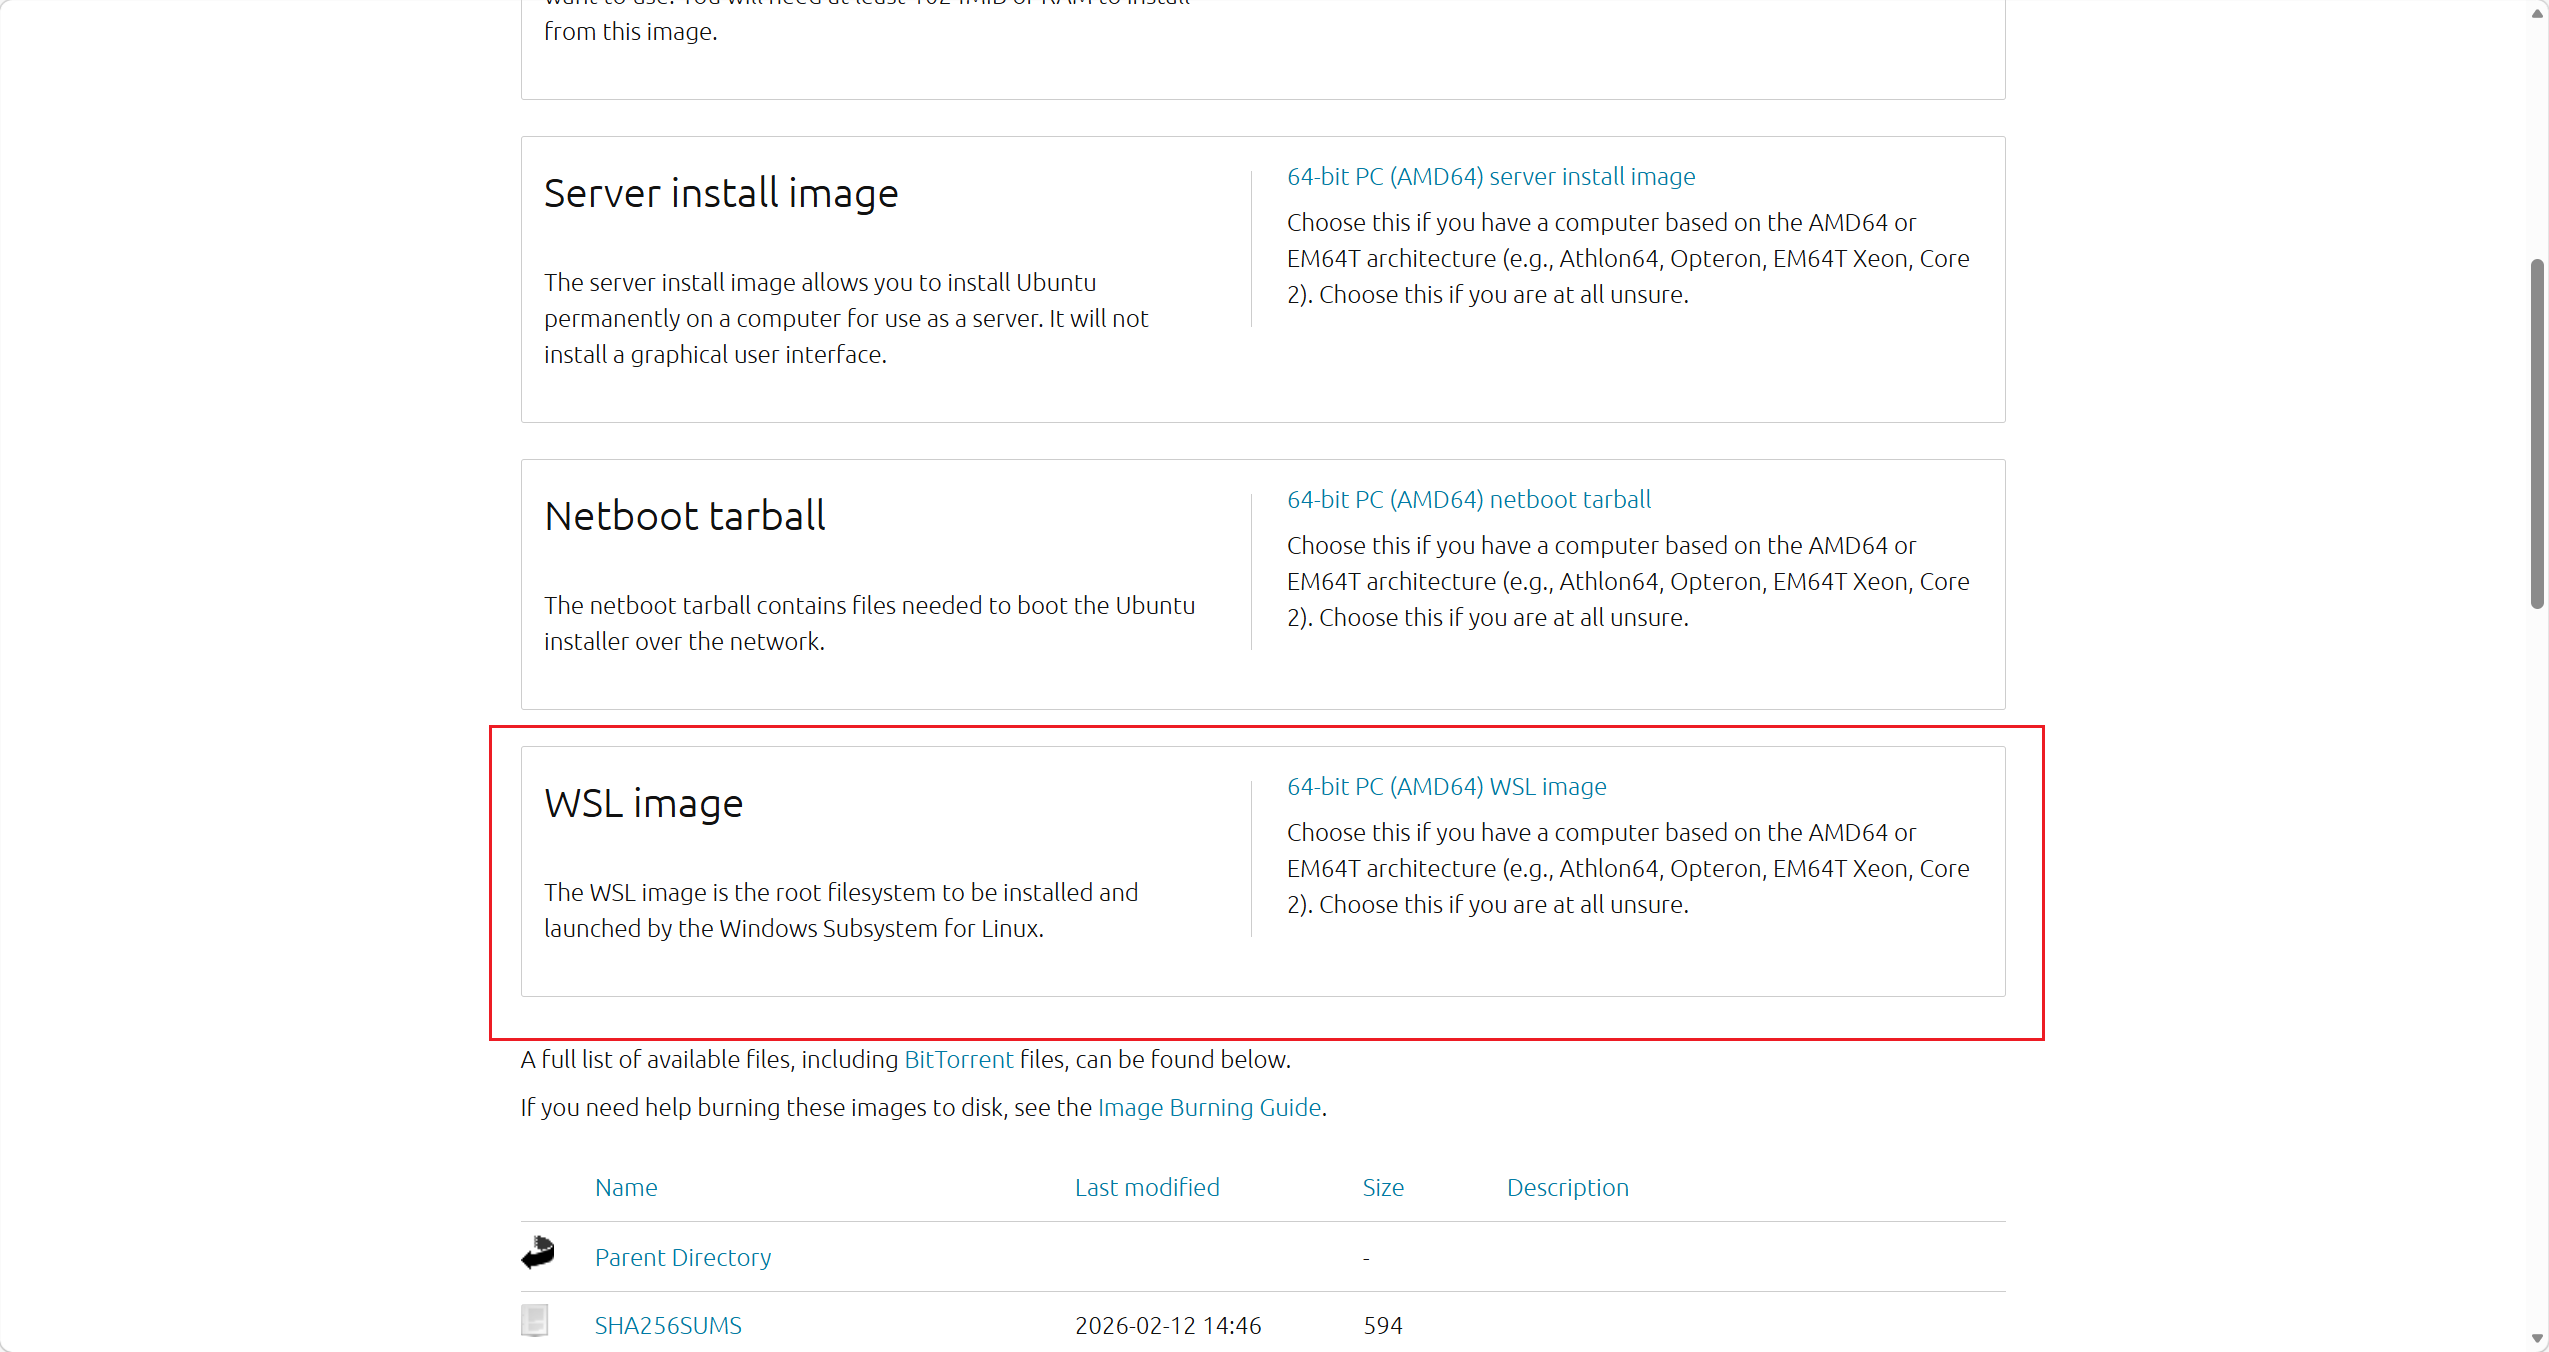
2.1 下载安装包
- 官方链接:Ubuntu 24.04 (Noble Numbat)
- 百度网盘:同上(见 1.3 节)
下载 .wsl 格式的安装包:
2.2 一键安装
打开 Windows PowerShell,运行以下命令(请替换实际路径):
1
wsl --install --from-file D:\path\to\ubuntu-24.04.4-wsl-amd64.wsl --location D:\WSL\Ubuntu2404
注意:
- 将
D:\path\to\...替换为.wsl文件的实际路径--location指定虚拟磁盘存放目录,请确保该目录已创建
WSL 会直接解析 .wsl 文件并将虚拟磁盘放在指定目录。
3. Ubuntu 基础配置
3.1 设置账户与密码
首次启动 Ubuntu 时,按提示设置用户名和密码。
3.2 换源(阿里云镜像)
编辑软件源配置文件:
1
sudo vim /etc/apt/sources.list.d/ubuntu.sources
替换为以下内容:
1
2
3
4
5
6
7
8
9
10
11
Types: deb
URIs: https://mirrors.aliyun.com/ubuntu
Suites: noble noble-updates noble-backports
Components: main universe restricted multiverse
Signed-By: /usr/share/keyrings/ubuntu-archive-keyring.gpg

Types: deb
URIs: https://mirrors.aliyun.com/ubuntu
Suites: noble-security
Components: main universe restricted multiverse
Signed-By: /usr/share/keyrings/ubuntu-archive-keyring.gpg
刷新软件源并升级系统:
1
2
sudo apt update
sudo apt upgrade -y
阿里云镜像站:https://developer.aliyun.com/mirror/ubuntu
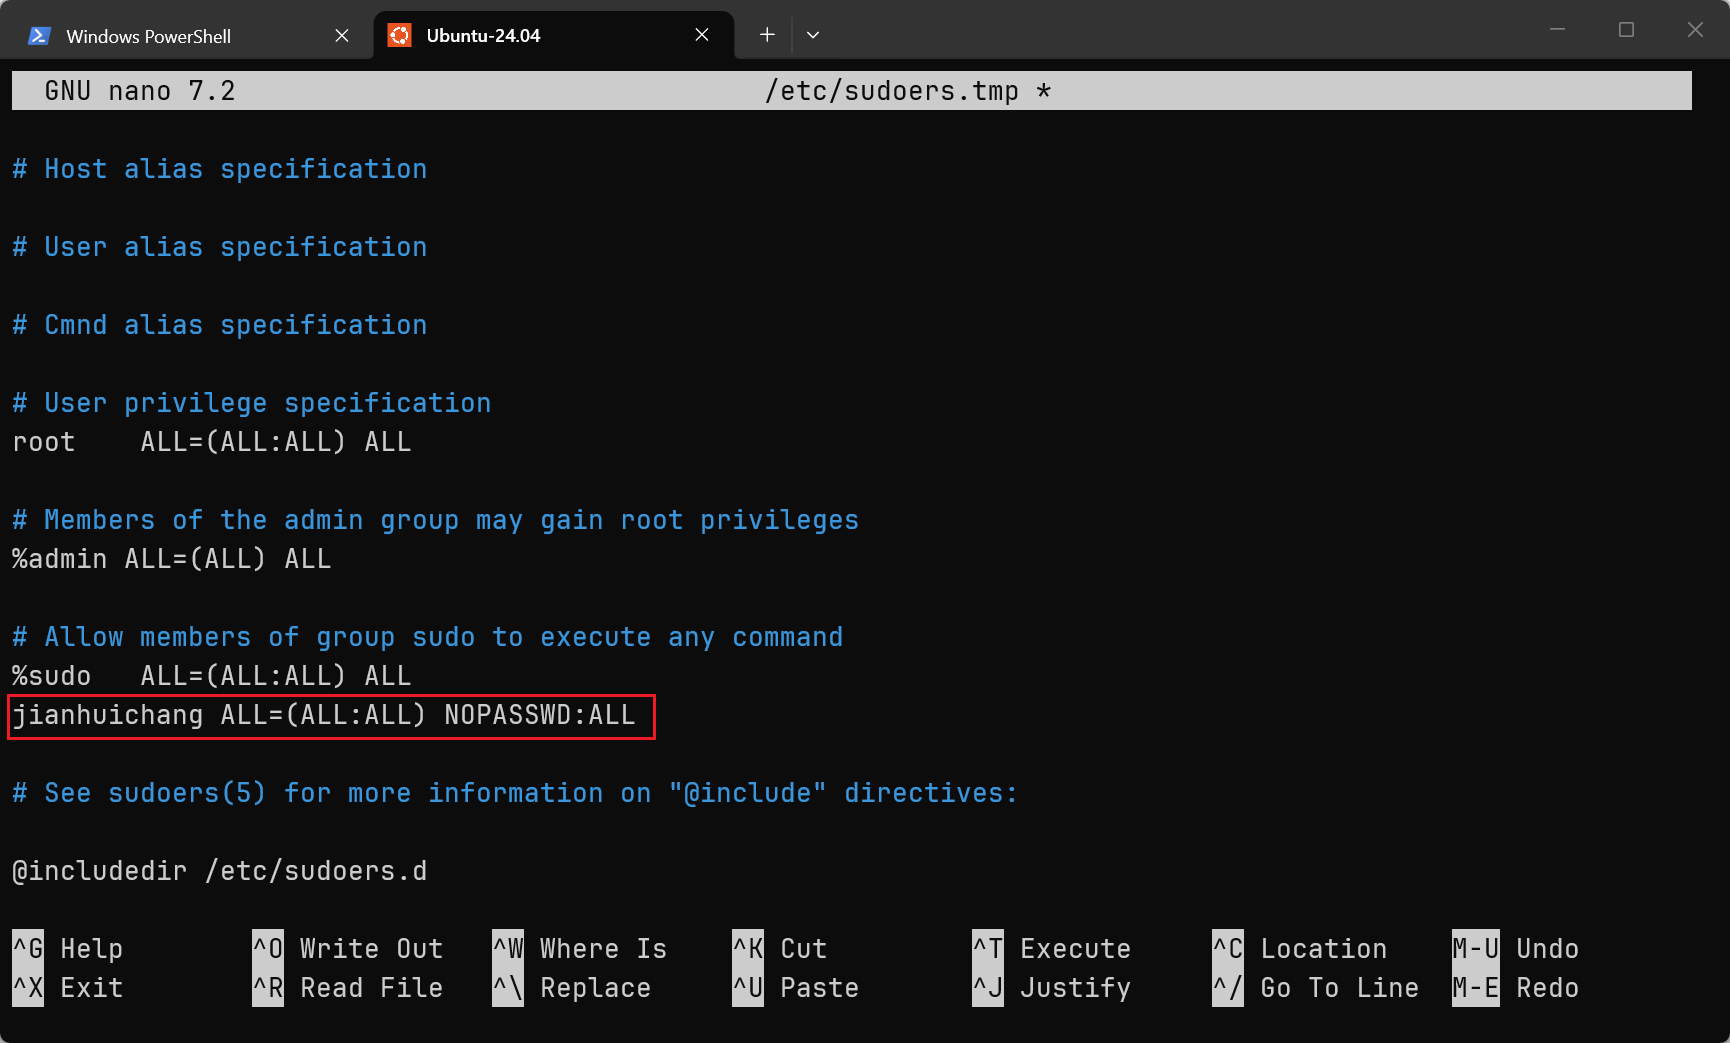
3.3 配置 sudo 免密
1
sudo -E visudo
在文件中找到 %sudo ALL=(ALL:ALL) ALL 所在行附近,添加:
1
your_username ALL=(ALL:ALL) NOPASSWD:ALL
将
your_username替换为你的实际用户名。
4. 安装 Git 并配置 GitHub
4.1 安装 Git
1
2
3
sudo apt update
sudo apt install git -y
git --version
4.2 配置用户信息
1
2
3
git config --global user.name "OrangeSunrise"
git config --global user.email "2812506866@qq.com"
git config --list
4.3 生成 SSH 密钥
1
ssh-keygen -t ed25519 -C "2812506866@qq.com"
连续按回车即可(不设置 passphrase)。
4.4 复制公钥
1
cat ~/.ssh/id_ed25519.pub
完整复制输出的内容。
4.5 添加到 GitHub
- 登录 GitHub
- 点击右上角头像 → Settings
- 左侧菜单 → SSH and GPG keys
- 点击 New SSH key
- Title 随意填写,Key 粘贴上一步复制的公钥
- 点击 Add SSH key
4.6 测试连接
1
ssh -T git@github.com
首次连接时输入 yes 确认指纹。看到以下提示即表示成功:
Hi OrangeSunrise! You’ve successfully authenticated, but GitHub does not provide shell access.
5. 离线安装 VS Code Server
在网络不佳的环境下,VS Code 连接 WSL 时会尝试下载 vscode-server 而卡住。可通过离线方式解决。
5.1 获取 Commit ID
在 Windows VS Code 中:帮助 (Help) → 关于 (About) → 复制 提交 (Commit) 的哈希值。
5.2 下载 Server 压缩包
在有网络的环境中,将 $COMMIT_ID 替换为实际值后下载:
1
https://update.code.visualstudio.com/commit:$COMMIT_ID/server-linux-x64/stable
若使用 VS Code Insiders,将末尾
stable改为insider。
5.3 解压到 WSL
将下载好的 vscode-server-linux-x64.tar.gz 放入 WSL 家目录,然后执行:
1
2
3
4
5
6
# 替换为你的实际 Commit ID
COMMIT_ID="your_commit_id_here"

mkdir -p ~/.vscode-server/bin/$COMMIT_ID
tar -zxf vscode-server-linux-x64.tar.gz -C ~/.vscode-server/bin/$COMMIT_ID --strip-components=1
ls ~/.vscode-server/bin/$COMMIT_ID
确认看到 node、server.sh 等文件即表示解压成功。之后 VS Code 连接 WSL 时会跳过下载。
5.4 配置 SSH 免密(可选)
如果只是用 VS Code 的 WSL 插件(左下角 >< 按钮连接),天然免密,无需额外配置。
如果已有 Windows SSH 密钥,只需将公钥注入 Ubuntu:
1
2
3
4
5
6
7
# 在 Windows PowerShell 中运行

# 1. 创建 .ssh 目录并设置权限
wsl bash -c "mkdir -p ~/.ssh && chmod 700 ~/.ssh"

# 2. 将公钥追加到 authorized_keys(根据实际密钥类型选择文件)
type $env:USERPROFILE\.ssh\id_ed25519.pub | wsl bash -c "cat >> ~/.ssh/authorized_keys && chmod 600 ~/.ssh/authorized_keys"
如果使用的是 RSA 密钥,将
id_ed25519.pub替换为id_rsa.pub。